Extending
version 0.9.35
Copyright © 2002-2025 by various contributors; see AUTHORS.txt.
https://tuxpaint.org/
May 2, 2025
| Table of Contents |
|---|

Copyright © 2002-2025 by various contributors; see AUTHORS.txt.
https://tuxpaint.org/
May 2, 2025
| Table of Contents |
|---|
If you wish to add or change things like Brushes, Starters, Rubber Stamps, and other content used by Tux Paint, you can do so fairly easily by simply adding, changing, or removing files where Tux Paint looks for them.
💡 Note: You'll need to re-launch Tux Paint for the changes to take effect.
Tux Paint looks for its various data files in its 'data' directory.
Where this directory goes depends on what value was set for "DATA_PREFIX" when Tux Paint was built. See 'Install documentation' for details.
By default, though, the directory is:
/usr/local/share/tuxpaint/
If you installed from a package, it is more likely to be:
/usr/share/tuxpaint/
Tux Paint looks for a directory called 'data' in the same directory as the executable. This is the directory that the installer used when installing Tux Paint e.g.:
C:\Program Files\TuxPaint\data
Tux Paint stores its data files inside the "Tux Paint" application icon (which is actually a special kind of folder on macOS & Mac OS X before it). The following steps explain how to get to the folders within it:
[Control] key and clicking the Tux Paint icon the in Finder. (If you have a mouse with more than one button, you can simply right-click the icon.) 💡 Note: If you install a newer version of Tux Paint and replace or discard the old version, you will lose changes made by following the instructions above, so keep backups of your new content (stamps, brushes, etc.).
Tux Paint also looks for files in a "TuxPaint" folder that you can place in your system's Application Support"Library"
/Library/Application Support/TuxPaint/data/
When you upgrade to a newer version of Tux Paint, the contents of this "TuxPaint" folder will stay the same, and remain accessible by all users of Tux Paint.
You can also create brushes, stamps, 'starters', templates, and fonts in your own user account directory (folder) for Tux Paint to find.
Your personal Tux Paint folder is stored in your personal "Application Data". For example, on newer Windows:
C:\Users\username\AppData\Roaming\TuxPaint\
Your personal Tux Paint folder is stored in your personal Application Support"
/Users/username/Library/Application Support/TuxPaint/
Your personal Tux Paint files go into a 'hidden directory' found in your account's home directory: /home/username/.tuxpaint/"
Don't forget the period (".") before the "tuxpaint"!
To add your own brushes, stamps, 'starters,' templates, and fonts, create subdirectories under your personal Tux Paint directory named "brushes", "stamps", "starters", "templates", "fonts", respectively.
(For example, if you created a brush named flower.png"/home/username/.tuxpaint/brushes/"
The brushes used for drawing with the 'Paint' and 'Lines' tools in Tux Paint are simply PNG image files.
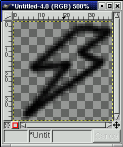
The alpha (transparency) of the PNG image is used to determine the shape of the brush, which means that the shape can be 'anti-aliased' and even partially-transparent!
Greyscale pixels in the brush PNG will be drawn using the currently-selected color in Tux Paint. Color pixels will be tinted.
Tux Paint will display descriptive text when a brush is selected. These are placed in plain text files with the same name as the PNG, but with a ".txt" filename extension. (e.g., "brush.png"'s description is stored in "brush.txt" in the same directory.)
The first line of the text file will be used as the US English description of the brush's image. It must be encoded in UTF-8.
Additional lines can be added to the text file to provide translations of the description, to be displayed when Tux Paint is running in a different locale (like French or Spanish).
The beginning of the line should correspond to the language code of the language in question (e.g., "fr" for French, and "zh_TW" for Traditional Chinese), followed by ".utf8=" and the translated description (Unicode, encoded in UTF-8).
For Tux Paint developers: There are scripts in the "brushes-po" directory for converting the text files to PO format (and back) for easy translation to different languages. Therefore you should never add or change translations in the ".txt" files directly.
If no translation is available for the language Tux Paint is currently running in, the US English text is used.
Use NotePad or WordPad to edit/create these files. Be sure to save them as plain-text, and make sure they have a ".txt" extension at the end of the filename.
Aside from a graphical shape, brushes can also be given other attributes. To do this, you need to create a 'data file' for the brush.
A brush's data file is simply a plain ASCII text file containing the options for the brush.
The file has the same name as the PNG image, but a ".dat" extension. (e.g., "brush.png"'s data file is the text file "brush.dat", found in the same directory.)
You may specify the spacing for brushes — that is, how frequently they are drawn across the length of a line or stroke. By default, the spacing will be the brush's height, divided by 4.
Add a line containing the line "spacing=N" to the brush's data file, where "N" is the spacing you want for the brush. (The lower the number, the more often the brush is drawn.)
Brushes may be animated. As the brush is used, each frame of the animation is drawn in sequence.
Lay each frame out across a wide PNG image. For example, if the brush is 30x30 and there are 5 frames, the image should be 150x30.
Add a line containing the line "frames=N" to the brush's data file, where "N" is the number of frames in the brush.
⚙ Note: If you'd rather the frames be flipped through randomly, rather than sequentially, also add a line containing "random" to the brush's data file.
Brushes may be configured to draw a different shape based on the direction of the line or brush stroke. Different shapes will be drawn depending on which of the eight compass directions the brush is moving — up (aka North), up/right (aka Northeast), right (aka East), down/right (aka Southeast), etc.). A ninth "center" shape is used when there's no motion (e.g., simply clicking/tapping and releasing the "Paint" tool, without dragging).
The directional shapes are divided into a 3x3 square in a PNG image. For example, if your brush is 30x30, the image should be 90x90, and each of the direction's shapes placed in a 3x3 grid.
Add a line containing the word "directional" to the brush's data file.
Brushes may be configured to rotate based on the angle of the line or brush stroke. (Unlike Directional Brushes, described above, only a single brush shape may be provided.
Add a line containing the word "rotate" to the brush's data file.
Brushes may be configured to continuously choose a random direction as you draw with them.
Add a line containing the word "chaotic" to the brush's data file.
You may mix both animated and either directional, rotating, or chaotic features into one brush. Use both options desired ("frames=N" and "directional", "rotate", or "chaotic"), in separate lines in the brush's ".dat" file.
For directional brushes, lay the brush out so that each 3x3 set of directional shapes are laid out across a wide PNG image. For example, if the brush is 30x30 and there are 5 frames, it would be 450x90. (The leftmost 150x90 pixels of the image represent the 9 direction shapes for the first frame, for example.)
Place the brush image PNGs (and any data text files) in the "brushes" directory.
💡 Note: If your new brushes all come out as solid squares or rectangles, it's because you forgot to use alpha transparency! See the 'PNG documentation' in Tux Paint for more information and tips.
All stamp-related files go in the "stamps" directory. It's useful to create subdirectories and sub-subdirectories there to organize the stamps. (For example, you can have a "holidays" folder with "halloween" and "christmas" sub-folders.)
Rubber Stamps in Tux Paint can be made up of a number of separate files. The one file that is required is, of course, the picture itself.
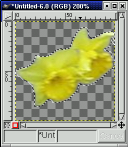
Stamps may be either PNG bitmap images or SVG vector images. They can be full-color or greyscale. The alpha (transparency) channel of PNGs is used to determine the actual shape of the picture (otherwise you'll stamp a large rectangle on your drawings).
PNGs can be any size, and Tux Paint (by default) provides a set of sizing buttons to let the user scale the stamp up (larger) and down (smaller).
SVGs are vector-based, and will be scaled appropriately for the canvas size being used in Tux Paint.
💡 Note: If your new PNG-based stamps all come out as solid squares or rectangles, it's because you forgot to use alpha transparency! See the 'PNG documentation' in Tux Paint for more information and tips.
💡 Note: If your new SVG stamps seem to have a lot of whitespace, make sure the SVG 'document' is no larger than the shape(s) within. If they are being clipped, make sure the 'document' is large enough to contain the shape(s). See the 'SVG documentation' in Tux Paint for more information and tips.
⚙ Advanced Users: The 'Advanced Stamps How-To' document describes, in detail, how to make PNG images which will scale perfectly when used as stamps in Tux Paint.
Tux Paint will display descriptive text when a stamp is selected. These are placed in plain text files with the same name as the PNG or SVG, but with a ".txt" filename extension. (e.g., "stamp.png"'s description is stored in "stamp.txt" in the same directory.)
The first line of the text file will be used as the US English description of the stamp's image. It must be encoded in UTF-8.
Additional lines can be added to the text file to provide translations of the description, to be displayed when Tux Paint is running in a different locale (like French or Spanish).
The beginning of the line should correspond to the language code of the language in question (e.g., "fr" for French, and "zh_TW" for Traditional Chinese), followed by ".utf8=" and the translated description (Unicode, encoded in UTF-8).
For Tux Paint developers: There are scripts in the "po" directory for converting the text files to PO format (and back) for easy translation to different languages. Therefore you should never add or change translations in the ".txt" files directly.
If no translation is available for the language Tux Paint is currently running in, the US English text is used.
Use NotePad or WordPad to edit/create these files. Be sure to save them as plain-text, and make sure they have a ".txt" extension at the end of the filename.
Tux Paint can play a sound effect when a stamp is selected. For example, the sound of a duck quaking when selecting a duck, or a brief piece of music when a musical instrument is chosen. Files may be in "WAVE (".wav")" or "OGG Vorbis (".ogg")" formats, and are given same name as the PNG or SVG image. (e.g., "stamp.svg"'s sound effect is the sound file "stamp.ogg" in the same directory.)
For sounds for different locales (e.g., if the sound is someone saying a word, and you want translated versions of the word said), also create WAV or OGG files with the locale's label in the filename, in the form: "stamp_LOCALE.EXT"
The sound effect that will be played when the stamp corresponding to the image file "stamp.png" is selected, and when Tux Paint is using the Spanish locale, would be "stamp_es.wav". Under the French locale, it would be "stamp_fr.wav". Under the Brazilian Portuguese locale, "stamp_pt_BR.wav". And so on...
If no localized sound effect can be loaded, Tux Paint will attempt to load the 'default' sound file. (e.g., "stamp.wav")
💡 Note: Also consider using descriptive sounds; see 'Stamp Descriptive Sound', below.
Tux Paint can also play a descriptive sound when a stamp is selected. For example, the sound of someone saying the word "duck" when selecting a duck, or the name of a musical instrument when one is chosen. Files may be in "WAVE (".wav")" or "OGG Vorbis (".ogg")" formats, and are given same name as the PNG or SVG image, with "_desc" at the end. (e.g., "stamp.svg"'s descriptive sound is the sound file "stamp_desc.ogg" in the same directory.)
For descriptive sounds for different locales, also create WAV or OGG files with both "_desc" and the locale's label in the filename, in the form: "stamp_desc_LOCALE.EXT"
The descriptive sound that will be played when the stamp corresponding to the image file "stamp.png" is selected, and when Tux Paint is using the Spanish locale, would be "stamp_desc_es.wav". Under the French locale, it would be "stamp_desc_fr.wav". Under the Brazilian Portuguese locale, "stamp_desc_pt_BR.wav". And so on...
If no localized descriptive sound can be loaded, Tux Paint will attempt to load the 'default' sound file. (e.g., "stamp_desc.wav")
Aside from a graphical shape, a textual description, a sound effect, and a descriptive sound, stamps can also be given other attributes. To do this, you need to create a 'data file' for the stamp.
A stamp's data file is simply a plain ASCII text file containing the options for the stamp.
The file has the same name as the PNG or SVG image, but a ".dat" extension. (e.g., "stamp.png"'s data file is the text file "stamp.dat", found in the same directory.)
Stamps can be made to be either "colorable" or "tintable."
"Colorable" stamps they work much like brushes - you pick the stamp to get the shape, and then pick the color you want it to be. (Symbol stamps, like the mathematical and musical ones, are an example.)
Nothing about the original image is used except the transparency (from "alpha" channel). The color of the stamp comes out solid.

Add a line containing the word "colorable" to the stamp's data file.
"Tinted" stamps are similar to "colorable" ones, except the details of the original image are kept. (To put it technically, the original image is used, but its hue is changed, based on the currently-selected color.)

Add a line containing the word "tintable" to the stamp's data file.
Depending on the contents of your stamp, you might want to have Tux Paint use one of a number of methods when tinting it. Add one of the following lines to the stamp's data file:
tinter=normal" (the default) tinter=narrow"
normal" option described above, but starts a narrower hue range of ±6°. Anything found within 50% of the range (e.g. ±9°) is tinted. If too much of your stamp is being tinted, try this option. tinter=anyhue"
anyhue" and "narrow" options described above, but the hue range is ±180°. tinter=vector"
By default, a stamp can be flipped upside down, shown as a mirror image, or both. This is done using the control buttons below the stamp selector, at the lower right side of the screen in Tux Paint.
Sometimes, it doesn't make sense for a stamp to be flippable or mirrored; for example, stamps of letters or numbers. Sometimes stamps are symmetrical, so letting the user flip or mirror them isn't useful.
To prevent a stamp from being flipped vertically, add the option "noflip" to the stamp's data file.
To prevent a stamp from being mirrored horizontally, add the option "nomirror" to the stamp's data file.
By default, Tux Paint assumes that your stamp is sized appropriately for unscaled display on a 608x472 canvas. This was the original Tux Paint canvas size, provided by a 640x480 screen. Tux Paint will then adjust the stamp according to the current canvas size and, if enabled, the user's stamp size controls.
If your stamp would be too big or too small, you can specify a scale factor. If your stamp would be 2.5 times as wide (or tall) as it should be, add one of the following options, which represent the same adjustment, to the stamp's data file. (An equals sign, "=", may be included after the word "scale".)
scale 40%"scale 5/2"scale 2.5"scale 2:5"
Use NotePad or WordPad to edit/create these files. Be sure to save them as plain-text, and make sure they have a ".dat" extension at the end of the filename.
In some cases, you may wish to provide a pre-drawn version of a stamp's mirror-image, flipped image, or even both. For example, imagine a picture of a fire truck with the words "Fire Department" written across the side. You probably do not want that text to appear backwards when the image is flipped!
To create a mirrored version of a stamp that you want Tux Paint to use, rather than mirroring one on its own, simply create a second ".png" or ".svg" graphics file with the same name, except with "_mirror" before the filename extension.
For example, for the stamp "stamp.png" you would create another file named "stamp_mirror.png", which will be used when the stamp is mirrored (rather than using a backwards version of "stamp.png").
You may also provide a pre-flipped image with "_flip" in the name, and/or an image that is both mirrored and flipped, by naming it "_mirror_flip".
💡 Note: If the user flips and mirrors an image, and a pre-drawn "_mirror_flip" doesn't exist, but either "_flip" or "_mirror" does, it will be used, and mirrored or flipped, respectively.
The fonts used by Tux Paint are TrueType Fonts (TTF).
Simply place them in the "fonts" directory. When using the 'Text' and 'Label' tools, Tux Paint will present the font in the 'Letters' selector at the right, along with options to enable bold and/or italics, and change the size.
'Starter' images appear in the 'New' dialog, along with solid color background choices.
When you use a 'starter' image, make modifications, and save it, the original 'starter' image is not overwritten. Additionally, as you edit your new picture, the contents of the original 'starter' can affect it.
The most basic kind of 'starter' is similar to a picture in a coloring book. It's an outline of a shape which you can then color in and add details to. In Tux Paint, as you draw, type text, or stamp stamps, the outline remains 'above' what you draw. You can erase the parts of the drawing you made, but you can't erase the outline.
To create this kind of 'starter' image, simply create an outlined black and white picture in a paint program, and save it as a raster PNG file, or vector SVG. If saving as a PNG, you may optionally render the image as black-and-transparent, rather than black-and-white, although this is not required.
Along with the 'coloring-book' style overlay, you can also provide a separate background image as part of a 'starter' picture. The overlay acts the same: it can't be drawn over, erased, or affected by 'Magic' tools. However, the background can be!
When the 'Eraser' tool is used on a picture based on this kind of 'starter' image, rather than turning the canvas to a solid color, such as white, it returns that part of the canvas to the original background picture from the 'starter' image.
By creating both an overlay and a background, you can create a 'starter' which simulates depth. Imagine a background that shows the ocean, and an overlay that's a picture of a reef. You can then draw (or stamp) fish in the picture. They'll appear in the ocean, but never 'in front of' the reef.
To create this kind of 'starter' picture, simply create an overlay (with transparency) and save it as a PNG. Then create another image (without transparency), and save it with the same filename, but with "-back" (short for 'background') appended to the name. (e.g., "starter-back.png" would be the background ocean picture that corresponds to the overlay, or foreground.)
For best results, 'starter' images should be at least the same size as Tux Paint's drawing canvas. (See the "Loading Other Pictures into Tux Paint" section of Tux Paint's main documentation (README) for details on sizing.) If they are not, they will be stretched or scaled. This is done without affecting the shape ("aspect ratio"); however some smudging may be applied to the edges.
Place them in the "starters" directory. When the 'New' dialog is accessed in Tux Paint, the 'starter' images will appear in the screen that appears, after the various solid color choices.
💡 Note: 'Starters' are 'attached' to saved pictures, via a small text file that has the same name as the saved file, but with ".dat" as the extension. This allows it to continue to affect the drawing even after Tux Paint has been quit, or another picture is loaded or a new image is created. (In other words, if you base a drawing on a 'starter' image, it will always be affected by it.)
Aside from an image, starters can also be given other attributes. To do this, you need to create a 'data file' for the starter. (Note: Tux Paint prior to version 0.9.29 did not support starter options.)
A starter's data file is simply a plain ASCII text file containing the options for the starter.
The file has the same name as the image, but a ".dat" extension. (e.g., "starter.png"'s data file is the text file "starter.dat", found in the same directory.)
When a starter image is a different aspect ratio (width-to-height proportions) than Tux Paint's canvas, by default it will be scaled to fit entirely within the canvas, without stretching the starter (changing its aspect ratio); for example, a square starter on a portrait-shaped canvas will be placed in the center of the canvas. By default, Tux Paint will then take the strip of pixels at the edges of the starter and stretch them to the edges of the canvas, "smearing" it.
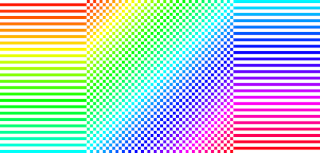
If it's acceptable for the starter image to be cropped in one or both directions, the "allowscale" may be used to tell Tux Paint which behavior to allow:
 For starters where it's alright to crop the left and right edges, but the top and bottom edges must be retained, use "
allowscale=horizontal".  For starters where it's alright to crop the top and bottom edges, but the left and right edges must be retained, use "
allowscale=vertical". allowscale=both". Contents from starter will always fill the canvas, regardless of how its aspect ratio compares to that of the canvas. allowscale=none".
This option allows you to specify how Tux Paint should fill the rest of the canvas, when the starter does not fit in one or the other direction. By default, as described above, Tux Paint will "smear" the pixels from the edges of the starter. (This can be specified explicitly with "background=smear".)
You can instead specify a solid background color (e.g., white for a 'coloring-book' style starter, with "background=#fff").
Colors may be listed using three decimal numbers (e.g., "255 68 136") or a 6- or 3-digit-long hexadecimal 'triplet' (e.g., "#ff4488" or "#F48").
See the "Color Palette File" section of "Options documentation" for further details.
This option allows you to specify how Tux Paint should position a starter, when it is being cropped in one or the other direction. By default, Tux Paint will place the center of the starter within the canvas. (This can be specified explicitly with "gravity=center".)
For example, if the top center of the starter contains the most important content, you can specify "gravity=top". Or, if the bottom right is important, specify "gravity=bottom-right".
The available options are:
center — prefer the center (the default)top — prefer the top centerbottom — prefer the bottom centerleft — prefer the left centerright — prefer the right centertop-left — prefer the top lefttop-right — prefer the top rightbottom-left — prefer the bottom leftbottom-right — prefer the bottom right![Landscape-shaped image of a horizon with the sun in the middle and a building on the right. [ Landscape-shaped image of a horizon with the sun in the middle and a building on the right. ]](../../html/images/gravity-center-landscape.png)
Focusing on the center of a starter image stretched to fit the width of the canvas.
![Portrait-shaped image of a horizon with the sun in the middle and the left side of building on the right. [ Portrait-shaped image of a horizon with the sun in the middle and the left side of building on the right. ]](../../html/images/gravity-center-portrait.png)
Focusing on the center of a starter image stretched to fit the height of the canvas.
![Landscape-shaped image of the sky with the sun at the bottom and the top of building on the right. [ Landscape-shaped image of the sky with the sun at the bottom and the top of building on the right. ]](../../html/images/gravity-top-landscape.png)
Focusing on the top of a starter image stretched to fit the width of the canvas.
![Landscape-shaped image of the ground with the sun at the top. [ Landscape-shaped image of the ground with the sun at the top. ]](../../html/images/gravity-bottom-landscape.png)
Focusing on the bottom of a starter image stretched to fit the width of the canvas.
![Portrait-shaped image of a horizon with the sun on the left and a building in the center. [ Portrait-shaped image of a horizon with the sun on the left and a building in the center. ]](../../html/images/gravity-right-portrait.png)
Focusing on the right of a starter image stretched to fit the height of the canvas.
💡 Note: Templates (described below) may also have options files, and currently support all of the same options as starters.
'Template' images also appear in the 'New' dialog, along with solid color background choices and 'Starters'.
Unlike pictures drawn in Tux Paint by users and then opened later, opening a 'template' creates a new drawing. When you save, the 'template' image is not overwritten. Unlike 'starters', there is no immutable 'layer' above the canvas. You may draw over any part of it.
When the 'Eraser' tool is used on a picture based on this kind of 'template' image, rather than turning the canvas to a solid color, such as white, it returns that part of the canvas to the original background picture from the 'template' image.
'Templates' are simply image files (in PNG, JPEG, SVG, or KPX (KidPix) format). No preparation or conversion should be required.
For best results, 'template' images should be at least the same size as Tux Paint's drawing canvas. (See the "Loading Other Pictures into Tux Paint" section of Tux Paint's main documentation (README) for details on sizing.) If they are not, they will be stretched or scaled. This is done without affecting the shape ("aspect ratio"); however some smudging may be applied to the edges.
Place them in the "templates" directory. When the 'New' dialog is accessed in Tux Paint, the 'template' images will appear in the screen that appears, after the various solid color choices.
💡 Note: 'Templates' are 'attached' to saved pictures, via a small text file that has the same name as the saved file, but with ".dat" as the extension. This allows it to continue to affect the drawing even after Tux Paint has been quit, or another picture is loaded or a new image is created. (In other words, if you base a drawing on a 'template' image, it will always be affected by it.)
Like 'Starters', a configuration file may be specified that defines how Tux Paint should behave when applying 'template' images to the canvas when they do not have identical proportions (aspect ratio). See "Starter Options", above. (Note: Tux Paint prior to version 0.9.29 did not support starter options.)
💡 It's also possible to create basic Templates (with no options) from existing saved drawings directly within Tux Paint, from the "Open" dialog. They will be placed in the user's personal templates folder. (Note: Tux Paint prior to version 0.9.31 did not support Template creation from the Open dialog.)
Tux Paint supports numerous languages, thanks to use of the "gettext" localization library. (See the "Languages" section of "Options documentation" for how to change locales in Tux Paint.)
To translate Tux Paint to a new language, copy the translation template file, "tuxpaint.pot" (found in Tux Paint's source code, in the folder "src/po/"). Rename the copy as a ".po" file, with an appropriate name for the locale you're translating to (e.g., "es.po" for Spanish; or "pt_BR.po" for Brazilian Portuguese, versus "pt.po" or "pt_PT.po" for Portuguese spoken in Portugal.)
Open the newly-created ".po" file — you can edit in a plain text edtior, such as Emacs, Pico or VI on Linux, or NotePad on Windows. The original English text used in Tux Paint is listed in lines starting with "msgid". Enter your translations of each of these pieces of text in the empty "msgstr" lines directly below the corresponding "msgid" lines. (Note: Do not remove the quotes.)
Example:
msgid "Smudge"

          msgstr "Manchar"


          msgid "Click and drag to draw large bricks."

          msgstr "Haz clic y arrastra para dibujar ladrillos grandes."
Various tools exist to manage gettext translation catalogs, so you don't have to edit them by hand in a text editor. Here are a few:
💡 Note: It is best to always work off of the latest Tux Paint text catalog template ("tuxpaint.pot"), since new text is added, and old text is occasionally changed. The text catalog for the upcoming, unreleased version of Tux Paint can be found in Tux Paint's Git repository (see: https://tuxpaint.org/download/source/git/), and on the Tux Paint website at https://tuxpaint.org/help/po/.
To edit an existing translation, download the latest ".po" file for that language, and edit it as described above.
You may send new or edited translation files to Bill Kendrick, lead developer of Tux Paint, at: bill@newbreedsoftware.com, or post them to the "tuxpaint-i18n" mailing list (see: https://tuxpaint.org/lists/).
Alternatively, if you have an account with SourceForge.net, you can request to be added to the "tuxpaint" project and receive write-access to the Git source code repository so that you may commit your changes directly.
💡 Note: Support for new locales requires making additions to Tux Paint's source code ("/src/i18n.h" and "/src/i18n.c"), and requires updates to the Makefile, to ensure the ".po" files are compiled into ".mo" files, and available for use at runtime.
Tux Paint's 'Text' and 'Label' tools can provide alternative input methods for some languages. For example, when Tux Paint is running with a Japanese locale, the right [Alt] key can be pressed to cycle between Latin, Romanized Hiragana and Romanized Katakana modes. This allows native characters and words to be entered into the 'Text' and 'Label' tools by typing one or more keys on a keyboard with Latin characters (e.g., a US QWERTY keyboard).
To create an input method for a new locale, create a text file with a name based on the locale (e.g., "ja" for Japanese), with ".im" as the extension (e.g., "ja.im").
The ".im" file can have multiple character mapping sections for different character mapping modes. For example, on a Japanese typing system, typing [K] [A] in Hiragana mode generates a different Unicode character ("か") than typing [K] [A] in Katakana mode ("カ").
List the character mappings in this file, one per line. Each line should contain (separated by whitespace):
-" if none)
Start additional character mapping sections with a line containign the word "section".
Example:
# Hiragana

          304B ka -

          304C ga -

          304D ki -

          304E gi -

          304D:3083 kya -

          3063:305F tta -


          # Katakana

          section

          30AB ka -

          30AC ga -

          30AD ki -

          30AE gi -
⚙ Note: Blank lines within the ".im" file will be ignored, as will any text following a "#" (pound/hash) character — it can be used to denote comments, as seen in the example above.
💡 Note: Meanings of the flags are locale-specific, and are processed by the language-specific source code in "src/im.c". For example, "b" is used in Korean to handle Batchim, which may carry over to the next character.
💡 Note: Support for new input methods requires making additions to Tux Paint's source code ("/src/im.c"), and requires updates to the Makefile, to ensure the ".im" files are available for use at runtime.
Tux Paint's 'Text' and 'Label' tools can present an on-screen keyboard that allows the pointer (via a mouse, touch screen, eye-tracking systems, etc.) to be used to input characters. Files that describe the layout and available keys are stored in Tux Paint "osk" directory. Each keyboard layout is defined by a number of files (some of which may be shared by different layouts).
We'll use the QWERTY keyboard as an example:
qwerty.layout") This is a text file that specifies the other files used to describe the layout and key mappings.
layout qwerty.h_layout

            keymap us-intl-altgr-dead-keys.keymap

            composemap en_US.UTF-8_Compose

            keysymdefs keysymdef.h

            keyboardlist qwerty.layout default.layout
⚙ Note: Blank lines within the ".layout" file will be ignored, as will any text following a "#" (pound/hash) character — it can be used to denote comments, as seen in the example below.
The "keyboardlist" line describes which layouts to switch to, when the user clicks the left and right buttons on the keyboard. (See below.)
qwerty.h_layout")
This describes how big the keyboard is (as a "width × height" grid), and lists each key with its numeric keycode (see the "keymap" file, below), the width it should be drawn at (typically "1.0", to take one space on the keyboard, but in the example below, notice the "TAB" and "SPACE" keys are much wider), the character or text to display on the key, depending on which modifier keys have been pressed (one each for: no modifiers, [Shift], [AltGr], and [Shift] + [AltGr]), and finally whether or not the key is affected by the [CapsLock] key (use "1") or [AltGr] (alternate graphics) key (use "2"), or not at all (use "0").
The "NEWLINE" keyword is used to indicate the end of one row of the keyboard, and thus subsequent key layout descriptions will be beginning on a new row.
WIDTH 15

            HEIGHT 5


            KEY 49 1.0 ` ~ ` ~ 0

            KEY 10 1.0 1 ! ¡ ¹ 0

            KEY 11 1.0 2 @ ² ˝ 0

            KEY 12 1.0 3 # · ³ 0

            KEY 13 1.0 4 $ ¤ £ 0

            KEY 14 1.0 5 % € ¸ 0

            KEY 15 1.0 6 ^ ¼ ^ 0

            ...

            KEY 21 1.0 = + × ÷ 0

            KEY 22 2.0 DELETE DELETE DELETE DELETE 0


            NEWLINE


            KEY 23 1.5 TAB TAB TAB TAB 0

            KEY 24 1.0 q Q ä Ä 1

            KEY 25 1.0 w W å Å 1

            KEY 26 1.0 e E é É 1

            KEY 27 1.0 r R ® ® 1

            ...


            NEWLINE


            # Arrow to left will change to the previous keyboard

            KEY 2 1.0 <- <- <- <- 0


            KEY 133 2.0 Cmp Cmp Cmp Cmp 0


            # The ALT or ALTGR keys are used in 'im' (input methods) to switch the input mode

            KEY 64 2.0 Alt Alt Alt Alt 0


            # Space

            KEY 65 5.0 SPACE SPACE SPACE SPACE 0


            # AltGr

            KEY 108 2.0 AltGr AltGr AltGr AltGr 0


            # Paste

            KEY 143 2.0 Paste Paste Paste Paste 0


            # Arrow to right will change to the next keyboard

            KEY 1 1.0 -> -> -> -> 0
Notice here that alphabetic keys ([Q], [W], etc.) will be affected by [CapsLock], while numeric keys ([1], [2], etc.), [Space], and so on, will not.
Keycodes up to "8" are reserved for internal use. The ones currently used are described below.
0 —
empty button 1 —
next layout (per the layout file's "keyboardlist" setting) 2 —
previous layout (per the layout file's "keyboardlist" setting)
📜 Starting with Tux Paint 0.9.35, the XF86Paste keysym (value 143) can be used to initiate a copy/paste clipboard buffer "paste" event. See the "Paste" key in the keyboard layout files. (Pasting via a physical keyboard is initiated using the [Control] + [V] key combination.
us-intl-altgr-dead-keys.keymap")
This file defines which numeric keycodes (seen in the keyboard layout files, such as "qwerty.h_layout" described above) should be mapped to which actual characters that an application such as Tux Paint expects to receive when keys (e.g., on a real keyboard) are pressed.
If you're using an operating system such as Linux, which runs X-Window and has the "xmodmap" command-line tool available, you can run it with the ("print keymap expressions" option, "-pke", to generate a keymap file.
keycode 9 = Escape NoSymbol Escape Escape

            keycode 10 = 1 exclam exclamdown onesuperior 1 exclam 1
            exclam NoSymbol onesuperior

            keycode 11 = 2 at twosuperior dead_doubleacute 2 at 2
            at onehalf twosuperior

            keycode 12 = 3 numbersign periodcentered threesuperior
            dead_macron periodcentered

            ...

            keycode 52 = z Z ae AE Arabic_hamzaonyeh asciitilde
            guillemotright NoSymbol Greek_zeta Greek_ZETA U037D
            U03FF

            keycode 53 = x X x X Arabic_hamza Arabic_sukun
            guillemotleft NoSymbol Greek_chi Greek_CHI rightarrow
            leftarrow

            keycode 54 = c C copyright cent Arabic_hamzaonwaw
            braceright Greek_psi Greek_PSI copyright

            keycode 55 = v V v V Arabic_ra braceleft Greek_omega
            Greek_OMEGA U03D6

            keycode 56 = b B b B UFEFB UFEF5 Greek_beta Greek_BETA
            U03D0

            keycode 57 = n N ntilde Ntilde Arabic_alefmaksura
            Arabic_maddaonalef Greek_nu Greek_NU U0374 U0375

            keycode 58 = m M mu mu Arabic_tehmarbuta apostrophe
            Greek_mu Greek_MU U03FB U03FA

            keycode 59 = comma less ccedilla Ccedilla Arabic_waw
            comma comma less guillemotleft

            keycode 60 = period greater dead_abovedot dead_caron
            Arabic_zain period period greater guillemotright
            periodcentered

            keycode 61 = slash question questiondown dead_hook
            Arabic_zah Arabic_question_mark slash question

            keycode 62 = Shift_R NoSymbol Shift_R Shift_R

            ...
en_US.UTF-8_Compose")
This file describes single characters that can be composed by multiple inputs. For example, "[Compose]" followed by "[A]" and "[E]" can be used to create the "æ" character.
The file that comes with Tux Paint is based on the US English UTF-8 (Unicode) composemap that comes with X.Org's X Window system. The current version from the Xlib library has a web located page at https://www.x.org/releases/current/doc/libX11/i18n/compose/en_US.UTF-8.html.
keysymdef.h")
This file (which is a C programming language header file) is also from the X Window System. It defines the Unicode values of each keycap (e.g., "XK_equal" corresponds to "U+003D", for the character "=" ("EQUALS SIGN").
💡 Note: This file is not compiled into Tux Paint, but is read and parsed at runtime.
It is unlikely that any modification will be required of this file.
Tux Paint's Magic tools are pieces of software, external to the main Tux Paint application, that are loaded as "plugins" at runtime, and interact with the program using a defined Application Programming Interface (API). The plugins that ship with Tux Paint (as well as Tux Paint itself) are written in the C programming language.
Consult the Magic Tool Plugin API Documentation to learn how to write your own.